Planning a trek can feel overwhelming when you’re faced with multiple routes, varying difficulty levels, and conflicting advice online. If you’re searching for a clear, practical breakdown to help you choose the right path, this guide is built for you. In this article, we dive into a detailed jaroconca trek itinerary comparison to help you evaluate terrain challenges, time requirements, gear considerations, and overall experience value.
Whether you’re a first-time explorer or a seasoned wilderness enthusiast, understanding how different itineraries stack up can make the difference between a smooth adventure and a stressful one. We’ve analyzed route data, trekker feedback, elevation profiles, and on-ground logistics to ensure the insights you’re about to read are accurate and actionable.
By the end, you’ll know which itinerary aligns with your fitness level, adventure goals, and available time—so you can plan confidently and focus on the journey ahead, not the guesswork.
Choosing Your Path: A Guide to Jaroconca’s Premier Treks
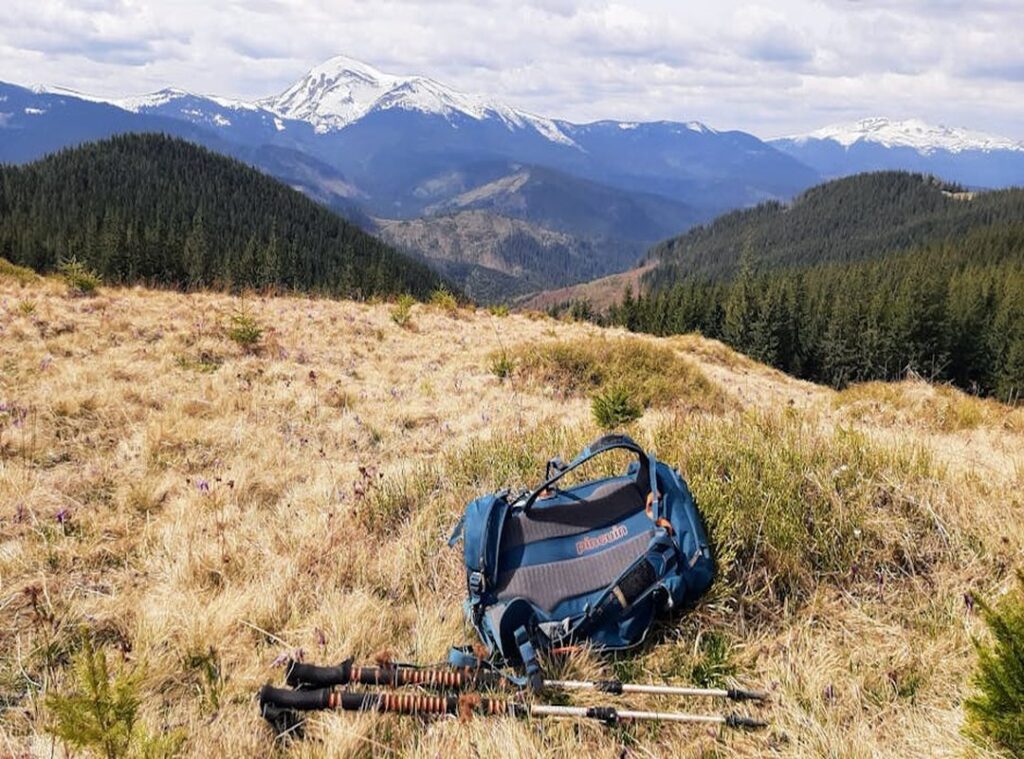
Jaroconca isn’t one trail; it’s a network of epic journeys. So, how do you choose? This jaroconca trek itinerary comparison breaks down three standout routes by duration, elevation gain (the total climb), and terrain type.
First, the Ridgeback Circuit spans five days, ideal for beginners wanting views without scrambling (rock climbing). Meanwhile, the Cloudspire Traverse demands rope skills and glacier travel—better for seasoned hikers. Finally, the Emberfall Loop blends forests and waterfalls, a middle ground.
You might wonder: what’s next? Consider permits, weather windows, and gear upgrades. Pro tip: train early.
The Serpent’s Spine: The Classic Traverse
The Serpent’s Spine is a true point-to-point ridgeline trek, tracing the backbone of the range from south trailhead to northern descent. Unlike valley-loop routes that dip in and out of forest cover, this traverse commits early to elevation and rarely gives it back. In other words, you’re here for the sky.
Duration: 5 Days / 4 Nights. Expect 8–12 miles per day, depending on weather and group pace. Night one typically lands at High Saddle Camp, followed by Granite Shelf, then the exposed Windbreak Basin. The final night is often spent near North Spur Meadow before the long descent. Compared to shorter out-and-back options, this itinerary demands steadier endurance—but rewards you with uninterrupted panoramas. (Think “Lord of the Rings” sweeping ridge shots.)
Key Highlights: First, there’s Eagle’s Perch, a dramatic promontory offering 270-degree alpine views. Then comes the crossing of Crystal Stream—a rare, reliable water source along an otherwise dry crest. Most importantly, the above-the-treeline exposure defines the experience. You’re walking the skyline, not beneath it.
Some hikers argue lower routes offer more wildlife and solitude. Fair point. However, if your priority is scale and spectacle rather than quiet forest immersion, the Spine wins in any jaroconca trek itinerary comparison.
Difficulty & Best For: Moderate to Strenuous. Daily elevation gains, sustained exposure (meaning steep drop-offs and open ridges), and limited shelter require solid acclimatization and confidence with heights. Pro tip: start pre-dawn on summit push days to avoid afternoon crosswinds.
Ultimately, this traverse favors experienced hikers who measure success in horizons crossed—not miles logged.
The Valley of Whispers: The Cultural Immersion Loop

Most trekkers chase altitude. They equate higher peaks with deeper meaning. The Valley of Whispers challenges that idea completely.
This lower-elevation loop winds through ancient, old-growth forest and into remote mountain villages where daily life unfolds at a human pace. Instead of racing for a summit selfie, you follow moss-lined paths, cross cedar bridges, and share tea with locals who’ve lived here for generations (and who definitely have better stories than your average guidebook).
Duration: 7 Days / 6 Nights. The slower rhythm is intentional. Cultural immersion takes time. Side trips to hidden shrines or forest clearings aren’t detours—they’re the point.
Key Highlights:
- The haunting “Sunken Temple” ruins, partially reclaimed by roots and mist
- A night in a traditional teahouse, complete with hearth-cooked meals
- Rare biodiversity in the old-growth forest, home to endemic orchids and high-canopy birdlife (UNESCO notes old-growth forests support significantly higher species density than secondary growth)
Some argue that without dramatic elevation gain, a trek lacks prestige. But prestige doesn’t equal depth. In fact, moderate terrain often allows more awareness—of sound, culture, and ecology.
Difficulty & Best For: Moderate. Ideal for trekkers who prefer layered experiences over peak-bagging, and who value story-rich trails over bragging rights.
If you’re weighing options, explore the complete trekking guide to jaroconca scenic ridge trails for contrast—then conduct your own jaroconca trek itinerary comparison.
Pro tip: Bring a small gift from home for village hosts. Thoughtful gestures open doors no summit ever could.
The Sky-Piercer’s Ascent: The Climber’s Challenge
If you’re eyeing Jaroconca’s highest accessible peak, understand this: this is not a scenic ramble. It’s a straight-up, aggressive out-and-back designed for one purpose—THE SUMMIT. No side quests. No lazy acclimatization hikes. Just a focused push upward and a controlled descent.
Route Overview
The line is direct and unapologetic. You establish base at Glacier’s Edge, a cold, wind-brushed platform that feels like the last outpost before the sky. From there, summit day begins with an alpine start (that pre-dawn departure mountaineers use to avoid unstable snow and afternoon weather swings). Expect rapid elevation gain and thin air that humbles even strong hikers.
Some argue three days is too compressed for a peak like this. I disagree—IF you’re properly conditioned. A tight schedule sharpens focus. There’s no room for sloppy pacing or overindulgent breaks.
Key Highlights
- The Summit Push: Expansive, hard-earned views that feel almost lunar.
- Glacier’s Edge Camp: Stark, beautiful, and brutally exposed.
- The Final Scramble: A technical rock-and-snow section requiring basic ropework and steady nerves (think controlled chaos).
Duration
3 Days / 2 Nights. Fast. Intense. Efficient.
Difficulty & Best For
Strenuous to Extreme. This route is for fit, experienced mountaineers with foundational technical skills and a singular objective. If you’re browsing a jaroconca trek itinerary comparison hoping for a “moderate alternative,” this isn’t it.
Pro tip: Train for back-to-back elevation days before attempting this. Strength fades; technique and mindset carry you higher.
At-a-Glance: Jaroconca Trek Breakdown
Use this jaroconca trek itinerary comparison to quickly match your fitness level and time frame with the right route. Think of it as your trail cheat sheet.
| Itinerary Name | Duration | Total Distance | Max Elevation | Difficulty Rating | Key Feature |
|---|---|---|---|---|---|
| Summit Sprint | 2 Days |
18 km | 3,200 m | Moderate | দ্রুত alpine ascent |
| Ridge Explorer | 4 Days | 42 km | 3,850 m | Challenging | Panoramic ridgelines |
| Full Traverse | 6 Days | 68 km | 4,100 m | سخت | Glacier basin crossing |
How to choose:
- Short on time? Pick Summit Sprint.
- Acclimatizing? Add an extra rest day.
- تدريب beforehand with weighted hikes (pro tip).
Which Jaroconca Itinerary Fits?
Choosing can feel overwhelming, so let’s simplify.
- Serpent’s Spine — best for panoramic seekers who want summit views.
- Valley of Whispers — ideal for immersion and storytelling trails.
- Sky-Piercer’s Ascent — a demanding climb for endurance builders.
Review the jaroconca trek itinerary comparison, match goals, and plan (boots laced).
When considering the contrasting experiences of short versus extended Jaroconca trekking itineraries, it’s also worth exploring the intricate trails and unique landscapes highlighted in our Yiganlawi article, which can add depth to your trekking adventure.
Plan Your Next Trek with Confidence
You set out looking for clarity on which route, duration, and difficulty level truly fit your adventure goals. Now you have a clearer understanding of how to evaluate terrain, time commitment, seasonal factors, and gear needs so you can choose wisely instead of guessing.
The biggest frustration for most trekkers is wasting time on the wrong itinerary—ending up overprepared, underprepared, or simply on a trail that doesn’t match their expectations. That mismatch can turn an exciting wilderness escape into an exhausting, stressful experience.
That’s exactly why using a structured jaroconca trek itinerary comparison approach changes everything. When you compare routes side by side with purpose, you eliminate uncertainty and move forward with confidence.
Don’t let confusion delay your next adventure. Get the clarity you need, avoid costly planning mistakes, and choose a trek that truly matches your skill level and goals. Explore more expert trekking guides and detailed comparisons now—so your next journey into the wild is your best one yet.
 Albertinovaso Beavers has opinions about horizon headlines. Informed ones, backed by real experience — but opinions nonetheless, and they doesn't try to disguise them as neutral observation. They thinks a lot of what gets written about Horizon Headlines, Jaroconca Trekking Guides, Niche Explorations is either too cautious to be useful or too confident to be credible, and they's work tends to sit deliberately in the space between those two failure modes.
Reading Albertinovaso's pieces, you get the sense of someone who has thought about this stuff seriously and arrived at actual conclusions — not just collected a range of perspectives and declined to pick one. That can be uncomfortable when they lands on something you disagree with. It's also why the writing is worth engaging with. Albertinovaso isn't interested in telling people what they want to hear. They is interested in telling them what they actually thinks, with enough reasoning behind it that you can push back if you want to. That kind of intellectual honesty is rarer than it should be.
What Albertinovaso is best at is the moment when a familiar topic reveals something unexpected — when the conventional wisdom turns out to be slightly off, or when a small shift in framing changes everything. They finds those moments consistently, which is why they's work tends to generate real discussion rather than just passive agreement.
Albertinovaso Beavers has opinions about horizon headlines. Informed ones, backed by real experience — but opinions nonetheless, and they doesn't try to disguise them as neutral observation. They thinks a lot of what gets written about Horizon Headlines, Jaroconca Trekking Guides, Niche Explorations is either too cautious to be useful or too confident to be credible, and they's work tends to sit deliberately in the space between those two failure modes.
Reading Albertinovaso's pieces, you get the sense of someone who has thought about this stuff seriously and arrived at actual conclusions — not just collected a range of perspectives and declined to pick one. That can be uncomfortable when they lands on something you disagree with. It's also why the writing is worth engaging with. Albertinovaso isn't interested in telling people what they want to hear. They is interested in telling them what they actually thinks, with enough reasoning behind it that you can push back if you want to. That kind of intellectual honesty is rarer than it should be.
What Albertinovaso is best at is the moment when a familiar topic reveals something unexpected — when the conventional wisdom turns out to be slightly off, or when a small shift in framing changes everything. They finds those moments consistently, which is why they's work tends to generate real discussion rather than just passive agreement.